Indications
Stricture – anterior urethra is most common site
Trauma – usually blunt following RTA/handle bars, usually posterior urethra
Post-op – following urethroplasty/mucosal graft
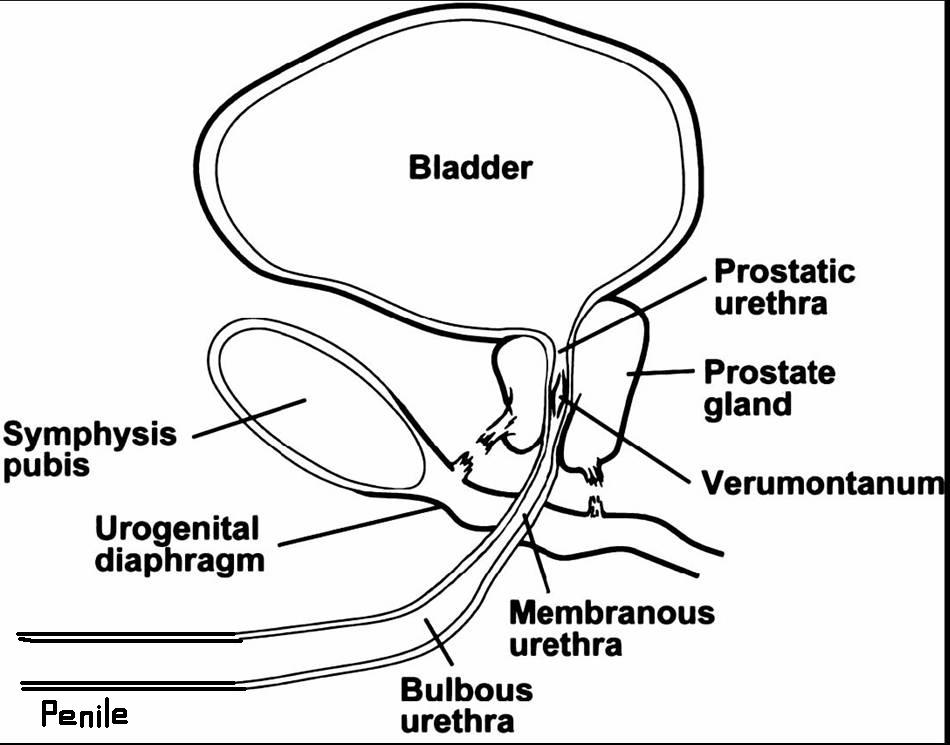
Anatomy
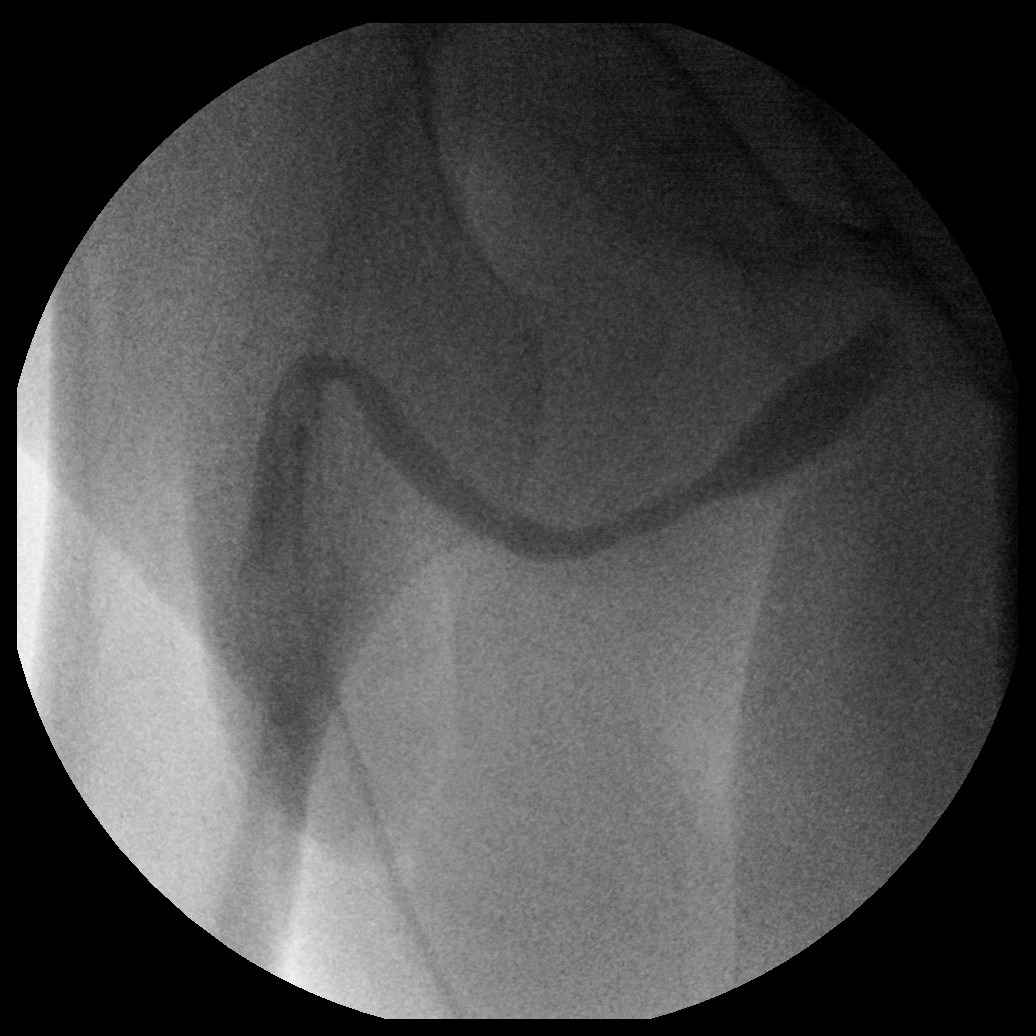
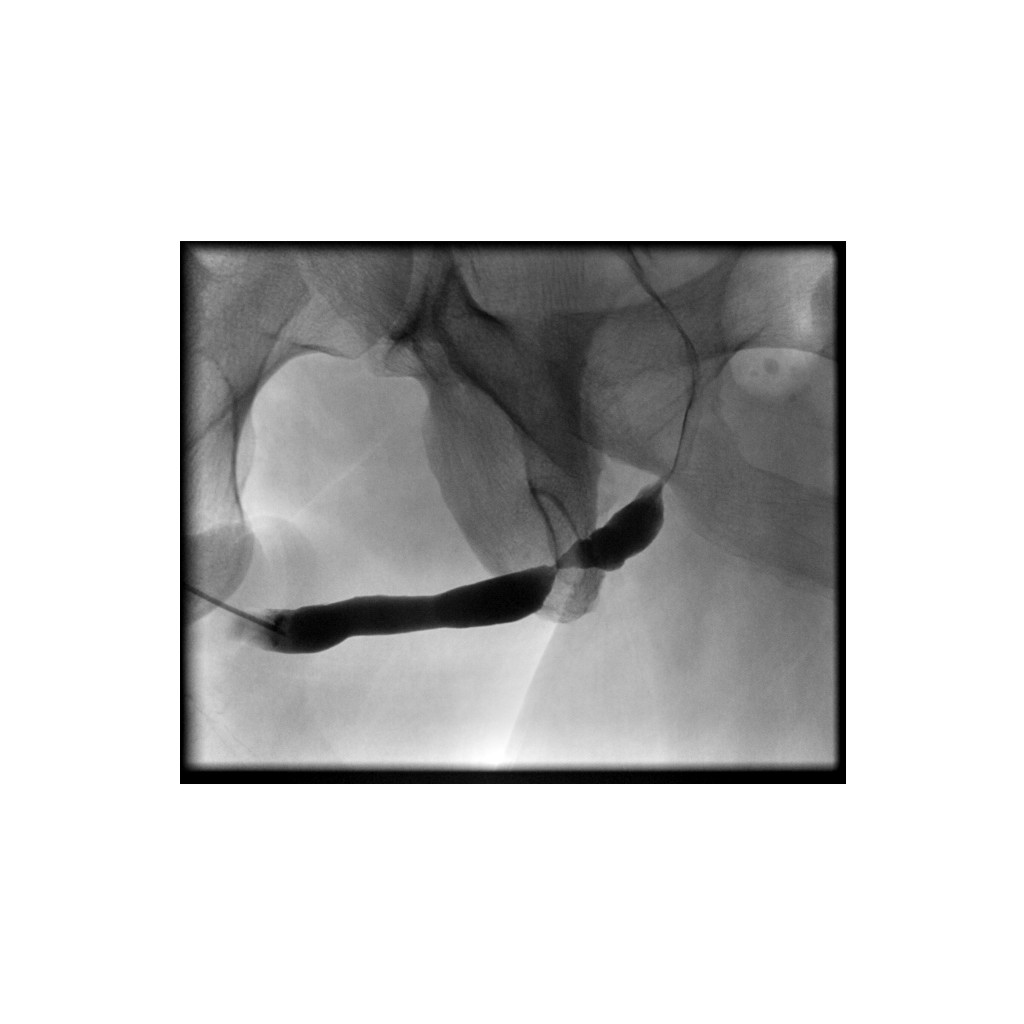
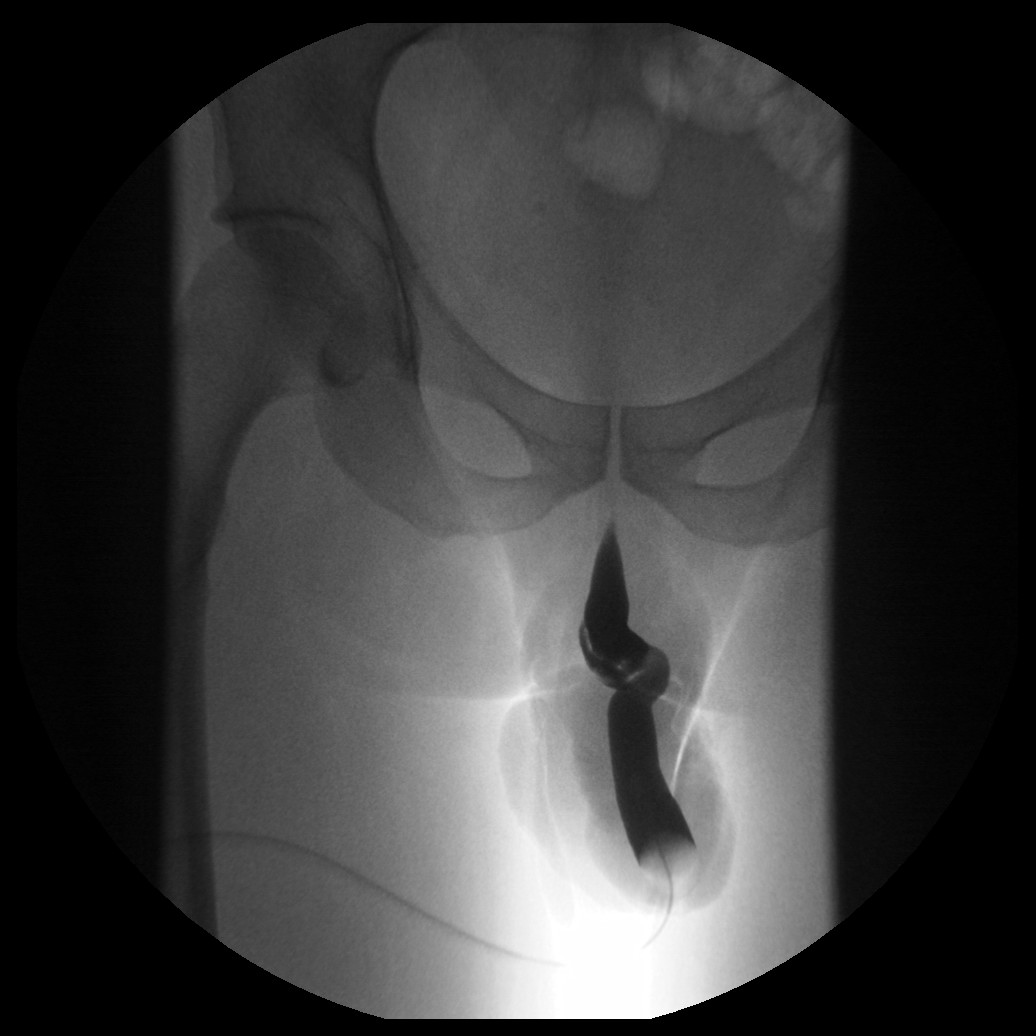
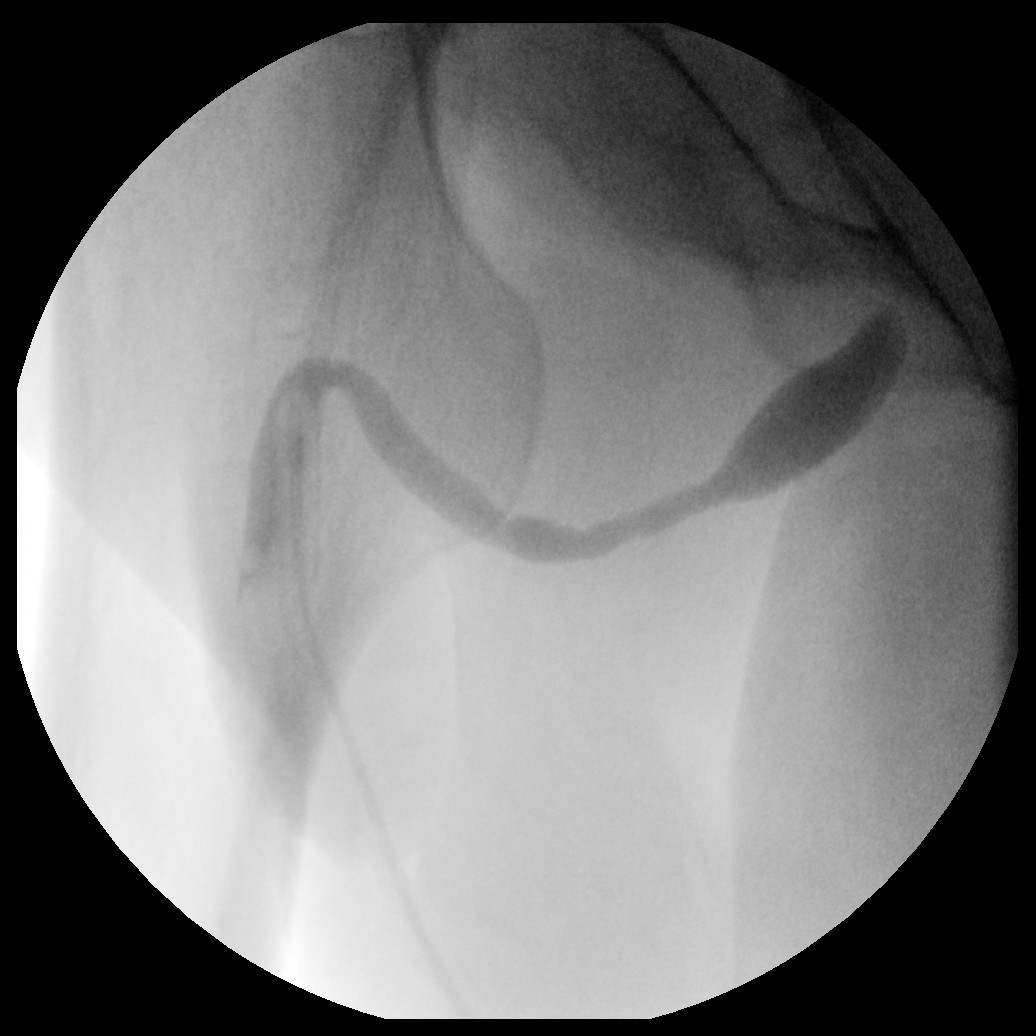
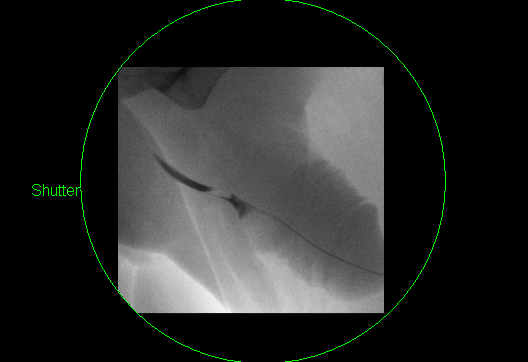
Normal urethrogram. LAO image demonstrating the entire urethra in profile.
Equipment
Sterile pack, sterile water, Foley catheter, 10ml syringe (for catheter balloon), 20ml syringe, 50ml bladder syringe, contrast (Niopam), grey connector, drape.
Procedure
Aseptic, non-touch.
Patient positioning - This can be done in one of two ways.
1.Lie the patient supine and get them to roll halfway on their right hand side with their right knee bent and left leg straight
Lie the patient supine and use the image intensifier to provide oblique imaging. The down side of this technique is access to the penis is hampered by the image intensifier and screening your hands. This position is used for trauma patients who cannot move.
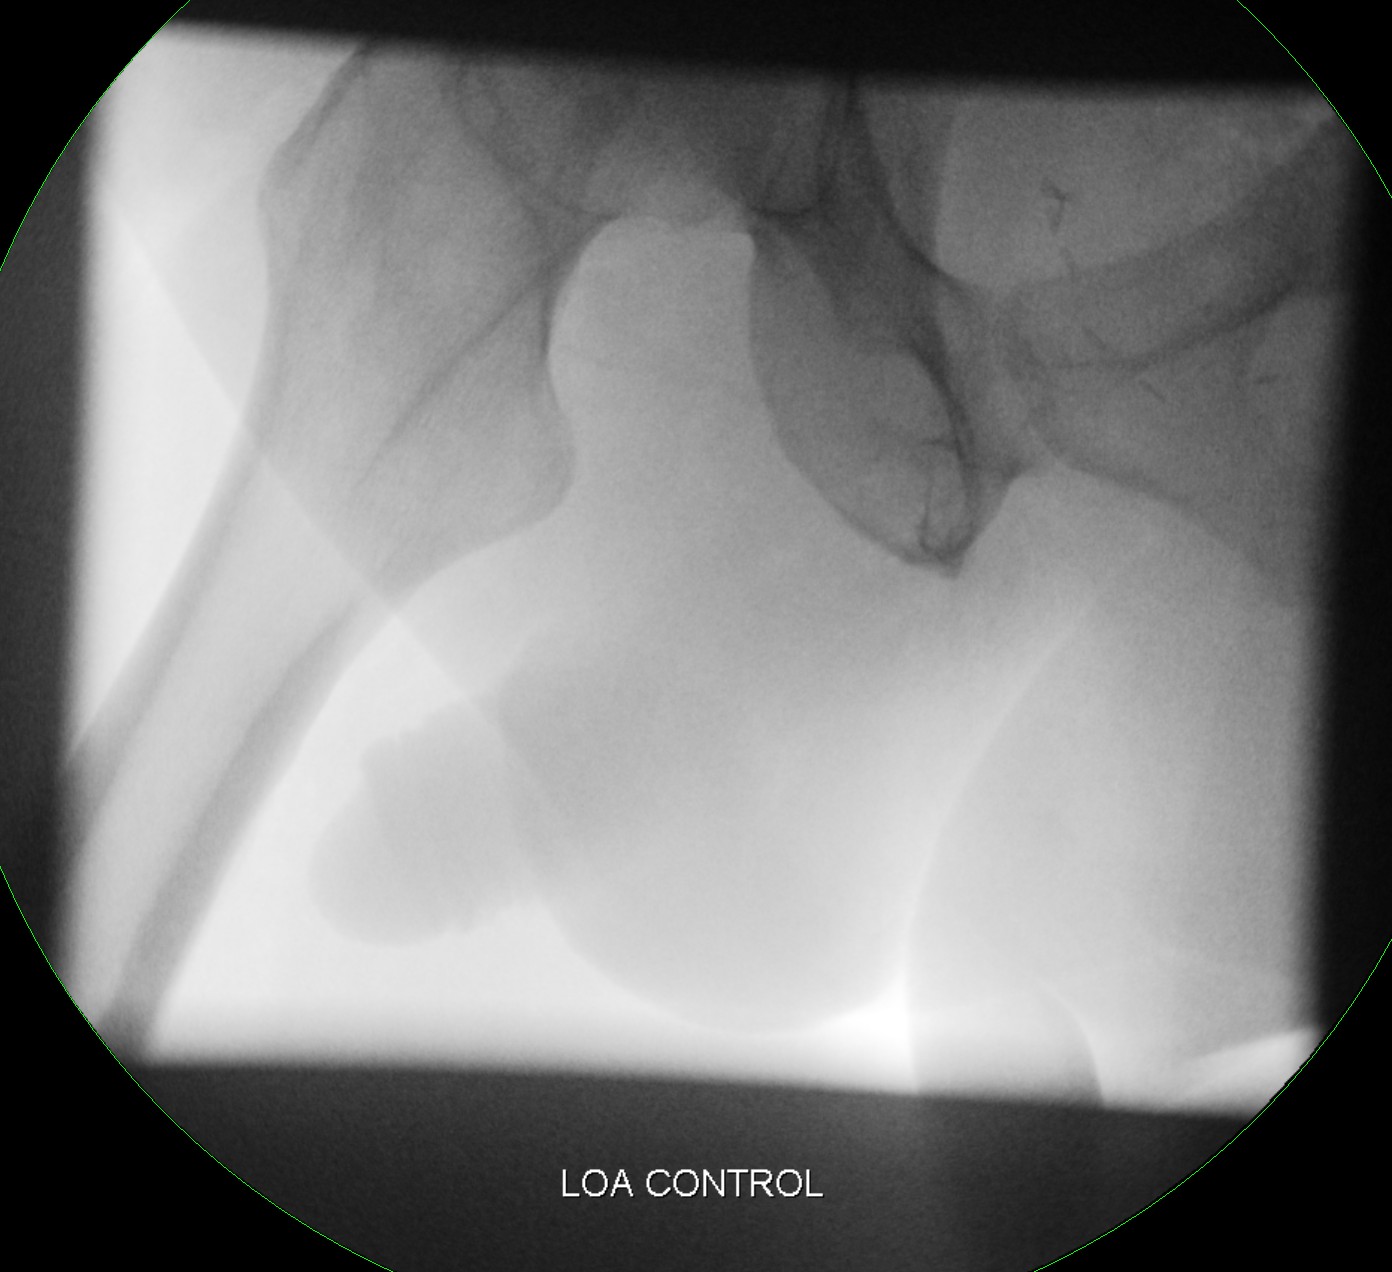
Take an LAO control film. This can be done prior to sterilisation and catheter insertion if you want to confirm your positioning is correct. Similarly it can be done once the catheter is positioned. Gentle traction should be applied to straighten the urethra. AP imaging in most cases does not help. However if a subtle abnormality is seen an AP film may help evaluate.
Before inserting, prime the catheter by flushing it with Niopam to remove any air and leave the syringe attached.
The catheter tip should be inserted a short way into the urethral meatus to have the catheter balloon sited in the fossa navicularis to enable it to be inflated sufficiently to obtain a good seal without causing too much discomfort – inflate the balloon gently with water until a seal is made. Usually 1-2ml is sufficient.
Try to avoid using instillagel as this makes it more likely to slip out, but it can be used if it is too uncomfortable.
Once you have taken your control film, you are ready to perform the examination
With the II in the AP position magnify and cone in, now start to gently inject the Niopam. Often a small volume syringe (20ml) with a grey catheter connector is preferable to a 50ml bladder syringe. This will allow a more delicate control of the injected volume of contrast in order to prevent pain or venous and lymphatic extravasation. If you are easily filling the bladder, later in the examination a 50 ml syringe can now be used.
As the urethra starts to opacify take sequential exposures to illustrate anatomy.
Gentle traction can be applied to elongate the urethra
RAO and AP views should be obtained as necessary.
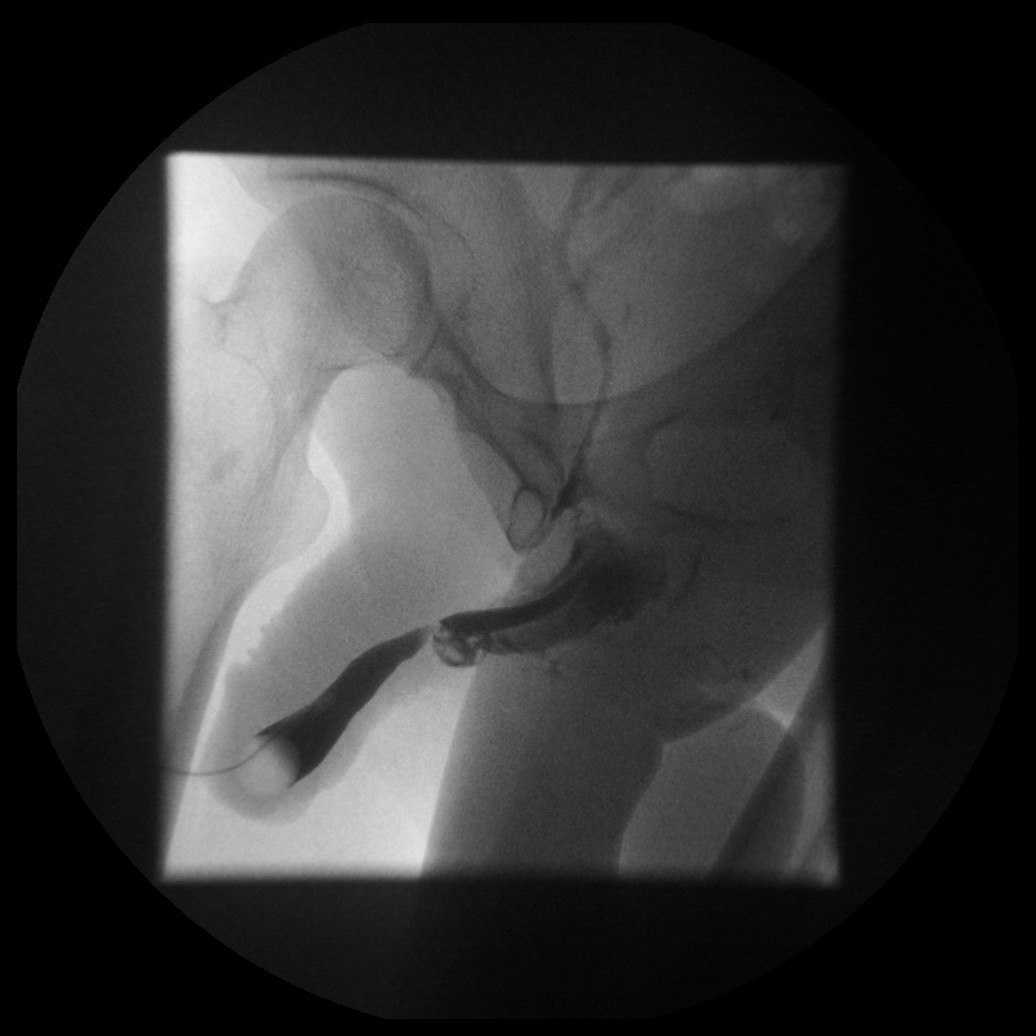
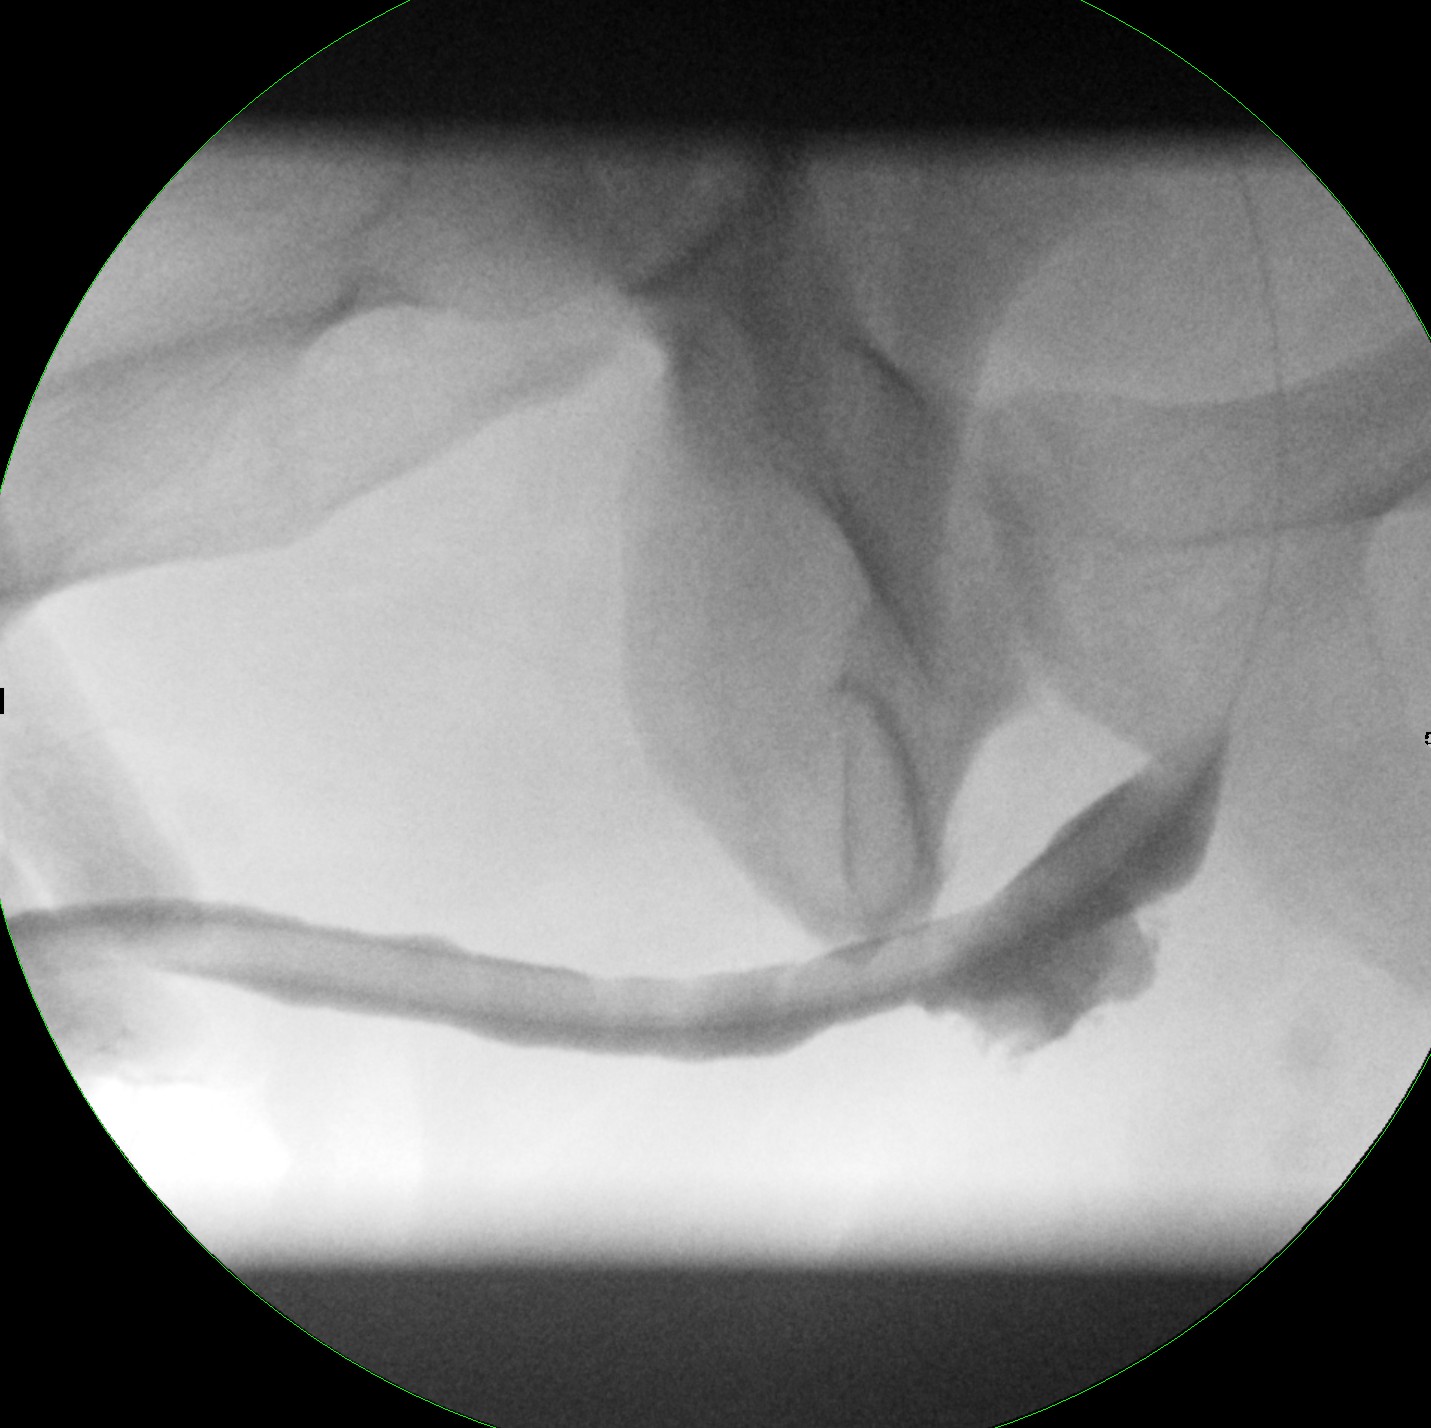
LAO image demonstrating a stricture at the peno-scrotal junction. Note the stricture overlies the ischium. Adjusting the obliquity to remove the bone will move this to improve detail. Note the normal collapsed posterior urethra with jet of contrast into the bladder.
LAO image demonstrating a similar stricture. Note the bladder has been filled.

Ensure you don’t miss a very distal penile stricture by inserting the catheter too far. At the end of the procedure you may need to deflate the balloon and inject whilst withdrawing the catheter to image the distal penile urethra.
Catheter inserted too far into the penile urethra
In normal cases, contrast may not pass beyond the membranous urethra retrogradely into the proximal urethra and bladder. Further injection will distend the anterior urethra and cause pain. Keeping the patient relaxed and using a slow injection may overcome this.
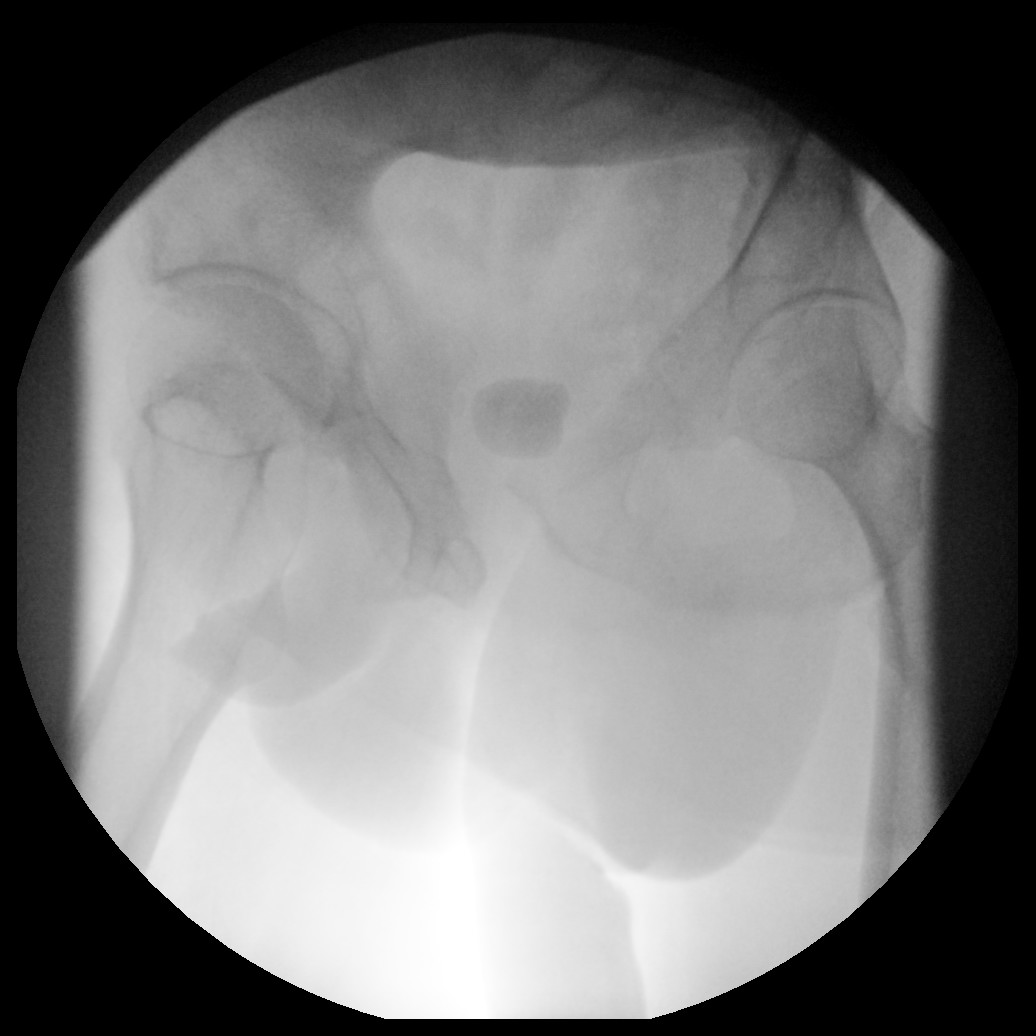
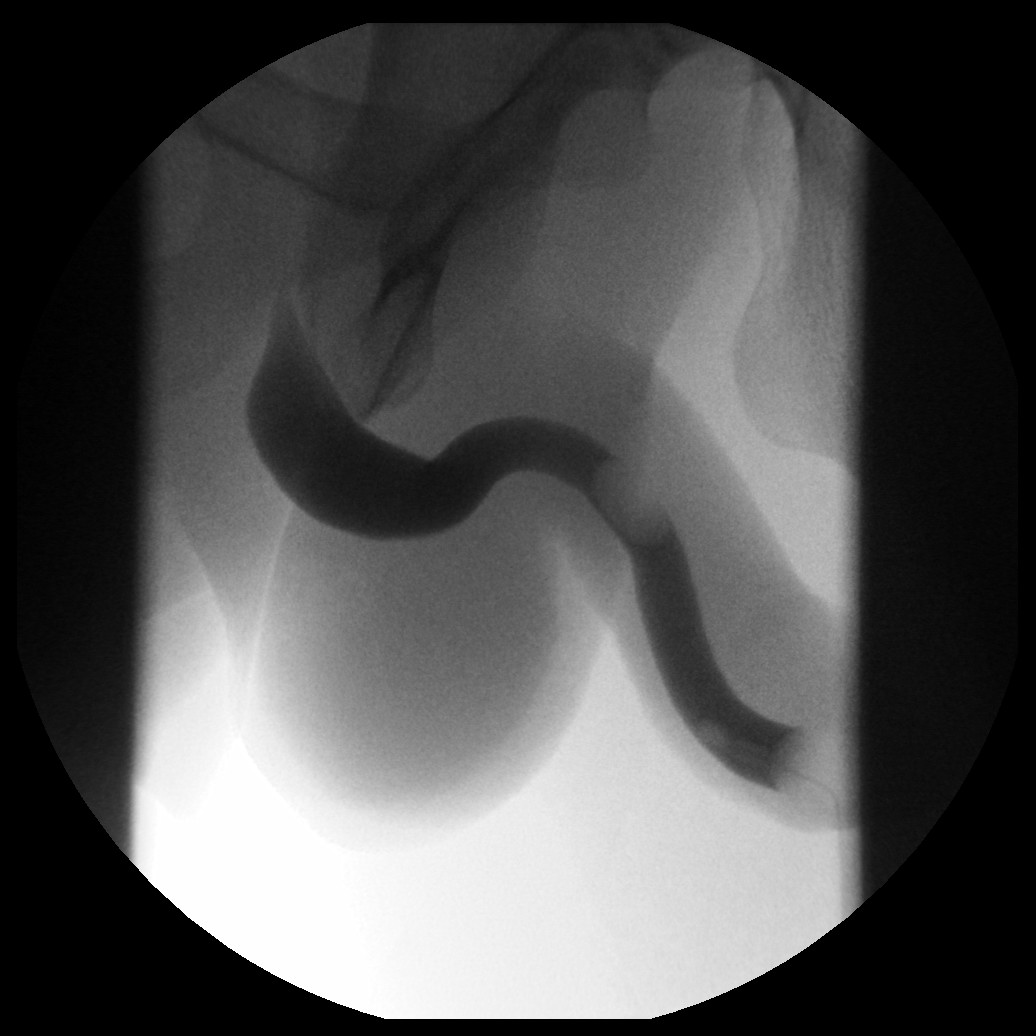
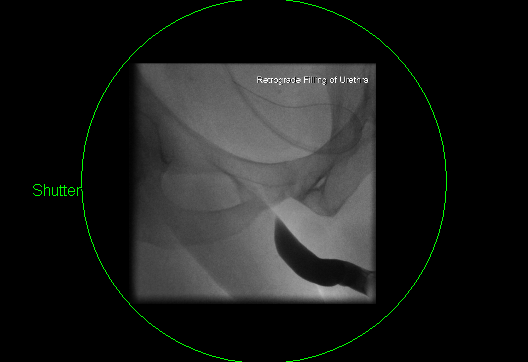
Contrast filled anterior urethra with normal tapering and hold up at the membranous urethra

If contrast flows through the posterior urethra into the bladder, make adjustments on centering so that you are now looking at the posterior urethra. If not then you will get poor contrast resolution due to air around the penis.
In most cases a good quality LAO view will be the only view needed. However if pathology is encountered then a RAO or AP view can also be taken.
LAO urethrogram which on initial inspection looks normal. However there is a subtle double density in the bulbar urethra which is cause by a very short stricture or web. In this case an AP/RAO or other modified view should be taken to open up this region.
In the case of urethral trauma watch for extravasation of contrast medium outside of the urethra – it can be subtle.
If there are bubbles of air in the urethra then you can leave the balloon inflated, aspirate the air keeping the syringe vertical then reinject contrast keeping the air in the top of the syringe.
In some cases for a complete examination, a micturating (antegrade ureterogram is needed). This is important particularly to image the posterior urethra and to assess strictures. In order to perform the micturating study sufficient contrast needs to reach the bladder.
If sufficient contrast is in the bladder, remove the bladder catheter but tell the patient not to urinate. Position a urine bottle trying to keep the same position for imaging. If the patient can urinate take images during. Frame grabs may be needed to get a couple of quick images but try to expose an image if possible. You can tilt the table feet down to use gravity as urinating lying down can be difficult. Also positioning the patient obliquely as mentioned previously may be beneficial to a supine position.
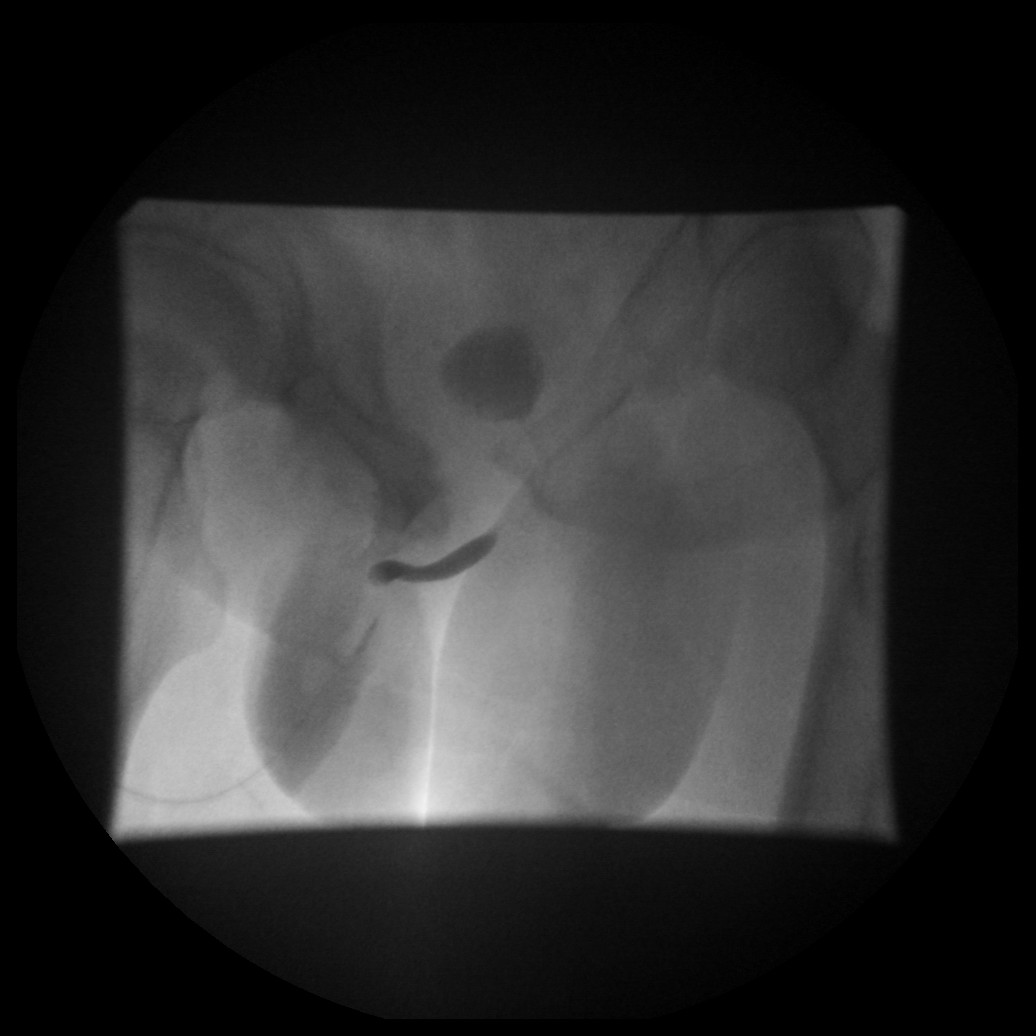
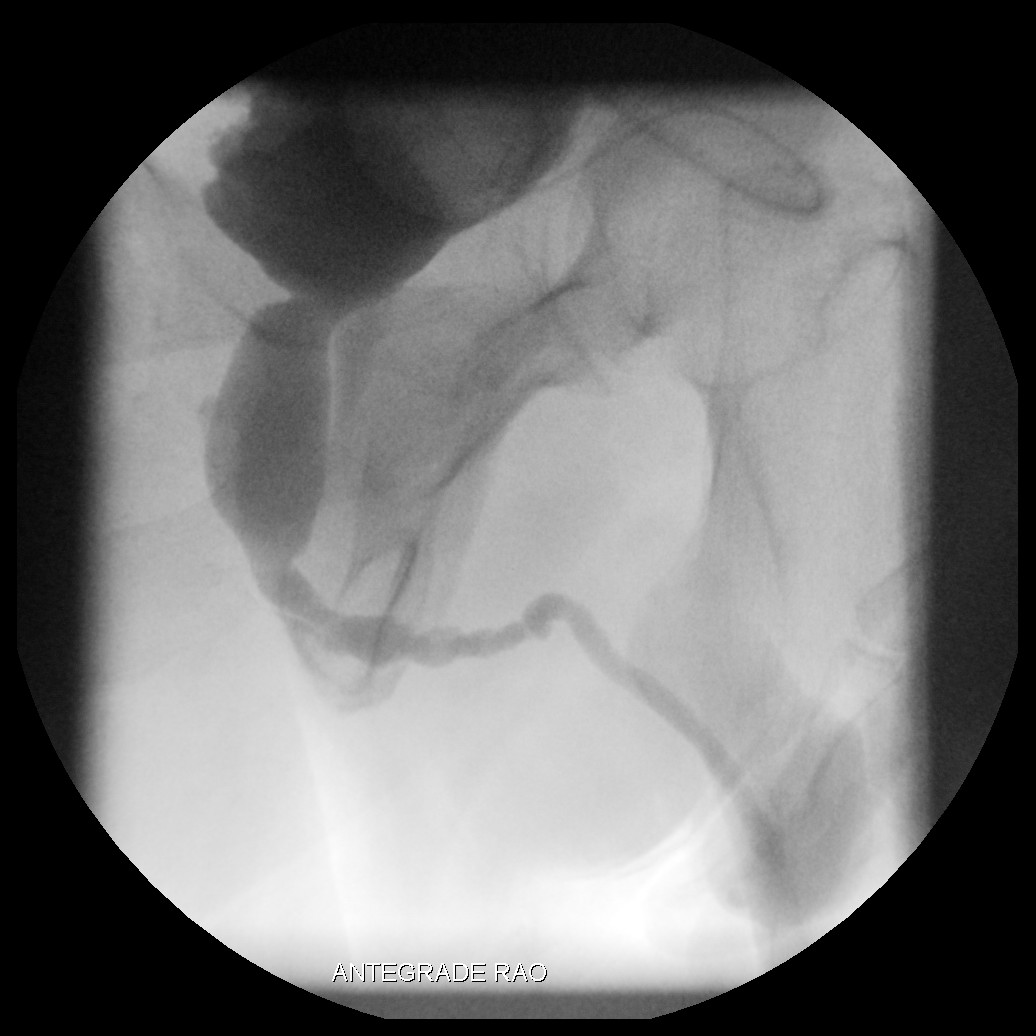
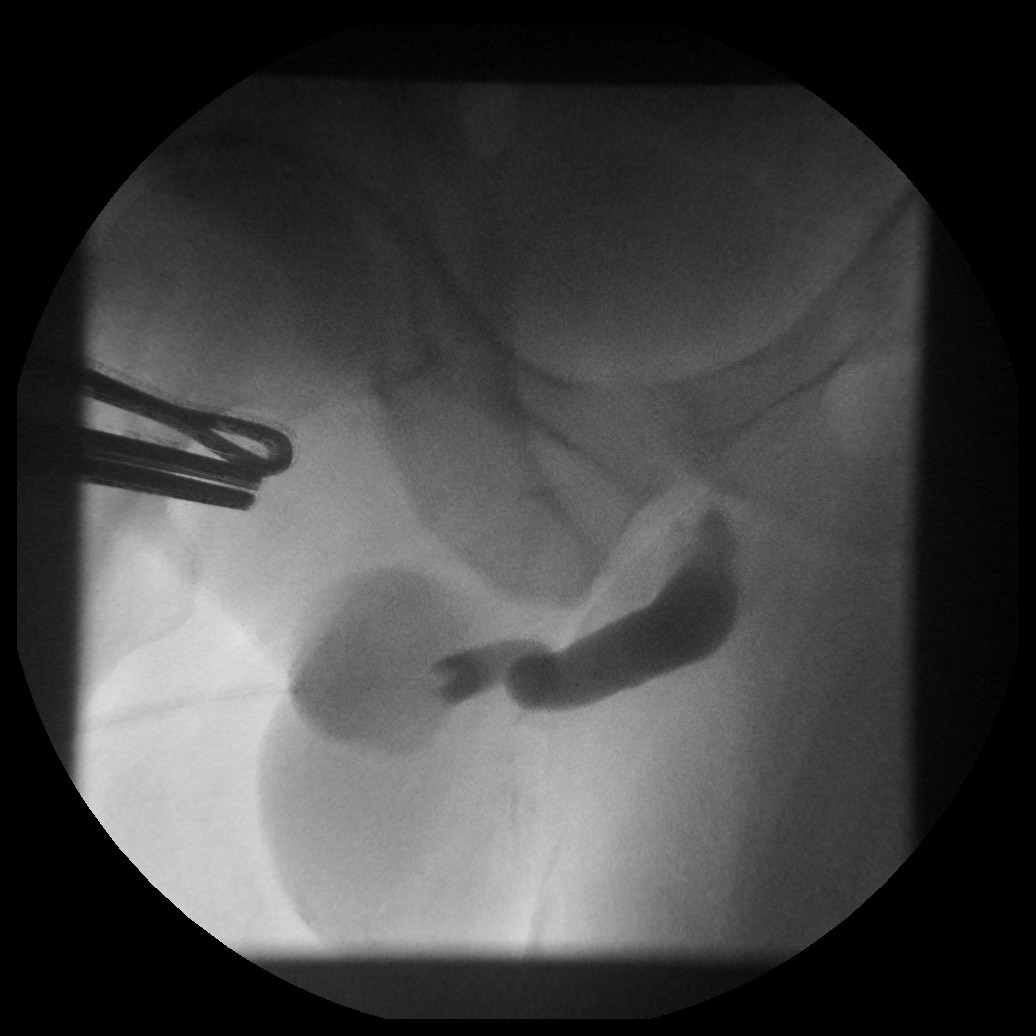
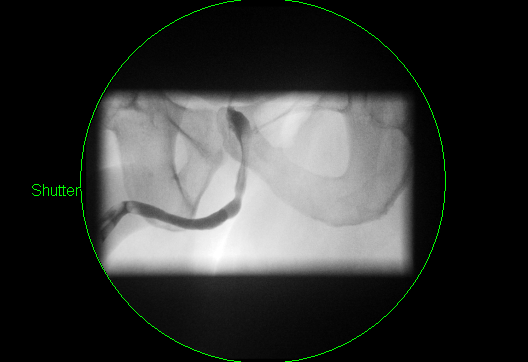
Antegrade (micturating) urethrogram taken in an RAO position. Note normal distension of the posterior urethra compared to the previous retrograde image.
At the end of the study deflate the balloon and remove the catheter.
Ensure that your images are labelled (control, AP, LAO, micturating etc). and send to PACS
Ensure you process the study correctly as a urethrogram. Not ureterogram. If you do a formal cystogram then add this as well.
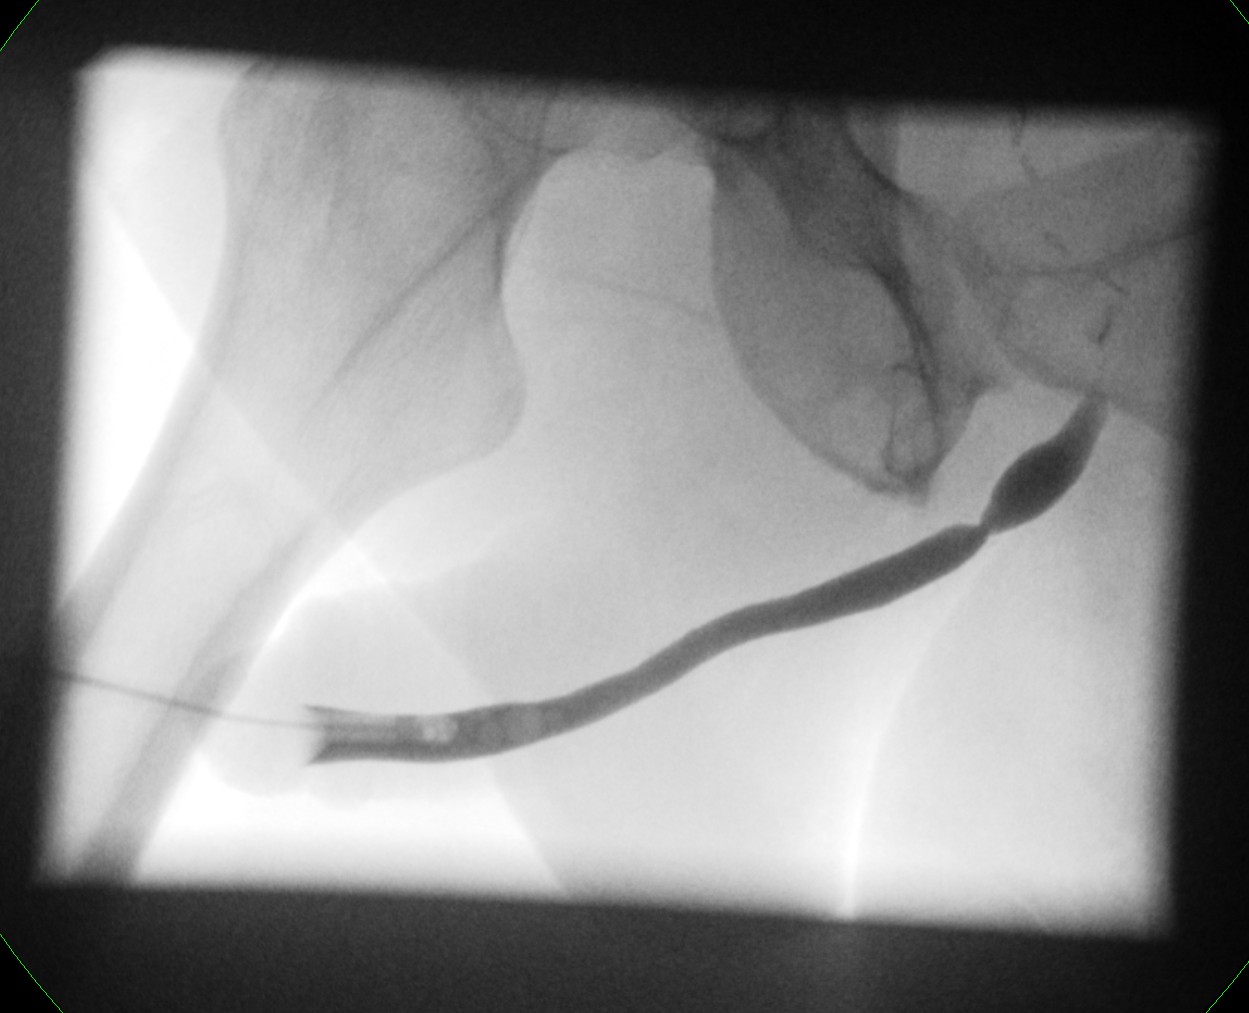
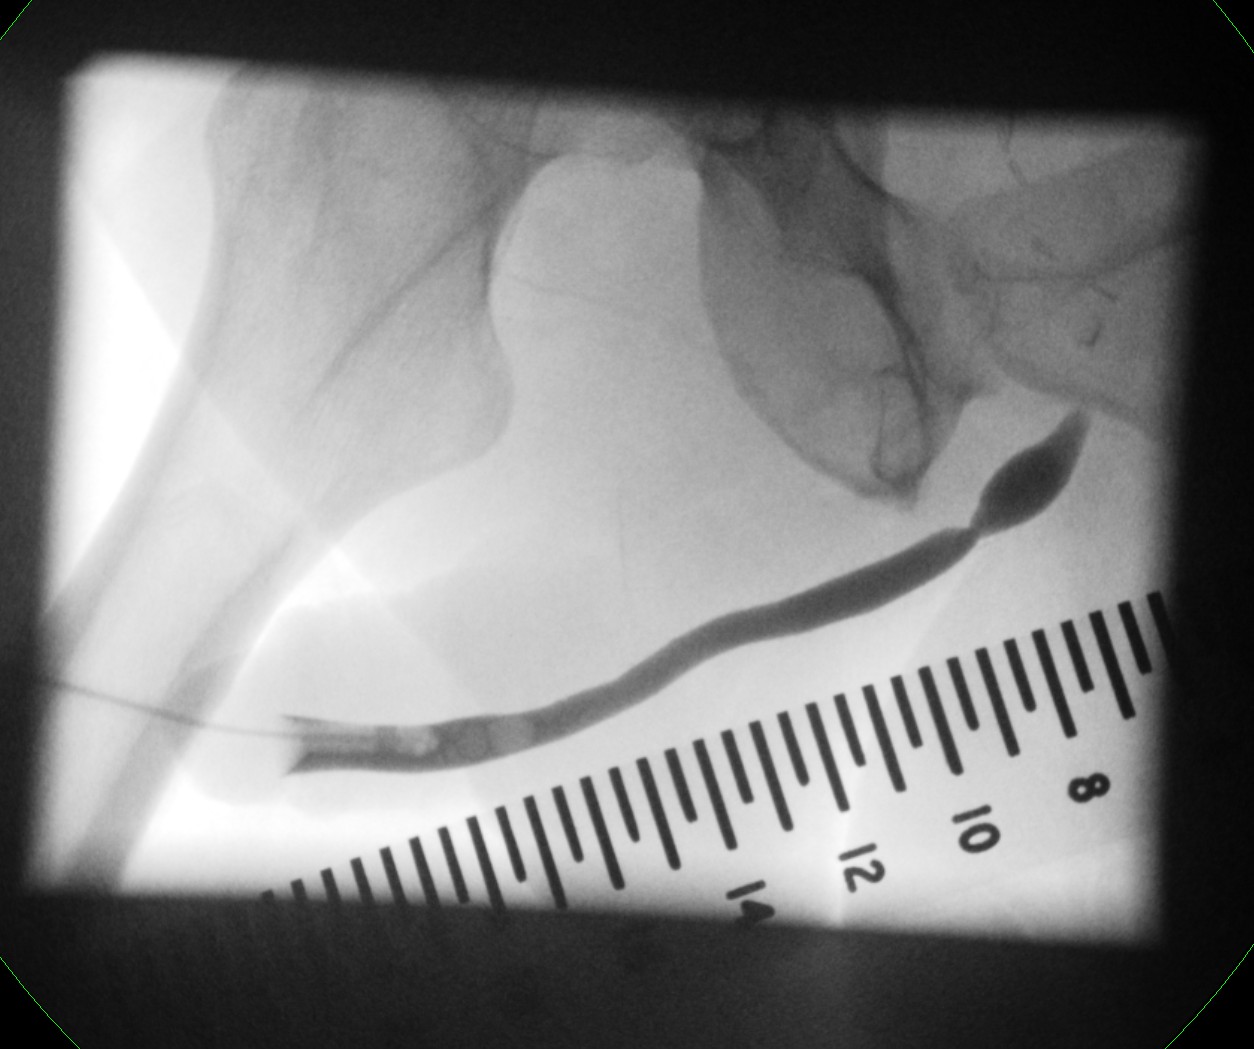
If there is a stricture present then the Urologists would like a guide as to length of stricture. There is a radio-opaque ruler available to place next to the patient as below. Please ensure that the ruler is cleaned between cases.
Penile urethral stricture images without and with radio-opaque ruler for measurement
Imaging following a stricturoplasty – pericatheter urethrogram
For imaging post stricturoplasty with a mucosal flap, the indwelling urethral catheter must not be removed. The aim is to image along side this foley catheter to see if there is a leak at the site of the flap. This can be a difficult technique and is best done with direct Consultant supervision. Once the urethrogram has been done, the patient should go to the Urology Ward/Clinic as they will be admitted for removal of catheter if appropriate.
Position as for normal urethrogram
Take control film.
A small bore feeding tube is fed alongside the urethral catheter once primed with contrast, a seal is created by squeezing the end of the penis.
Gently insert the feeding using fluoroscopic guidance to check position.
The site of the mucosal flap can sometimes be judged by the site of the stricture on pre operative urethrogram if performed. Careful centering and conning is need in order to prevent irradiation of your fingers.
There is often a lot of leakage- use inco sheets on the bed and floor.
Often contrast only refluxes to but not beyond the mucosal flap.
Once finished the patient should go to the urology ward/clinic for admission and potential catheter removal.
Control film
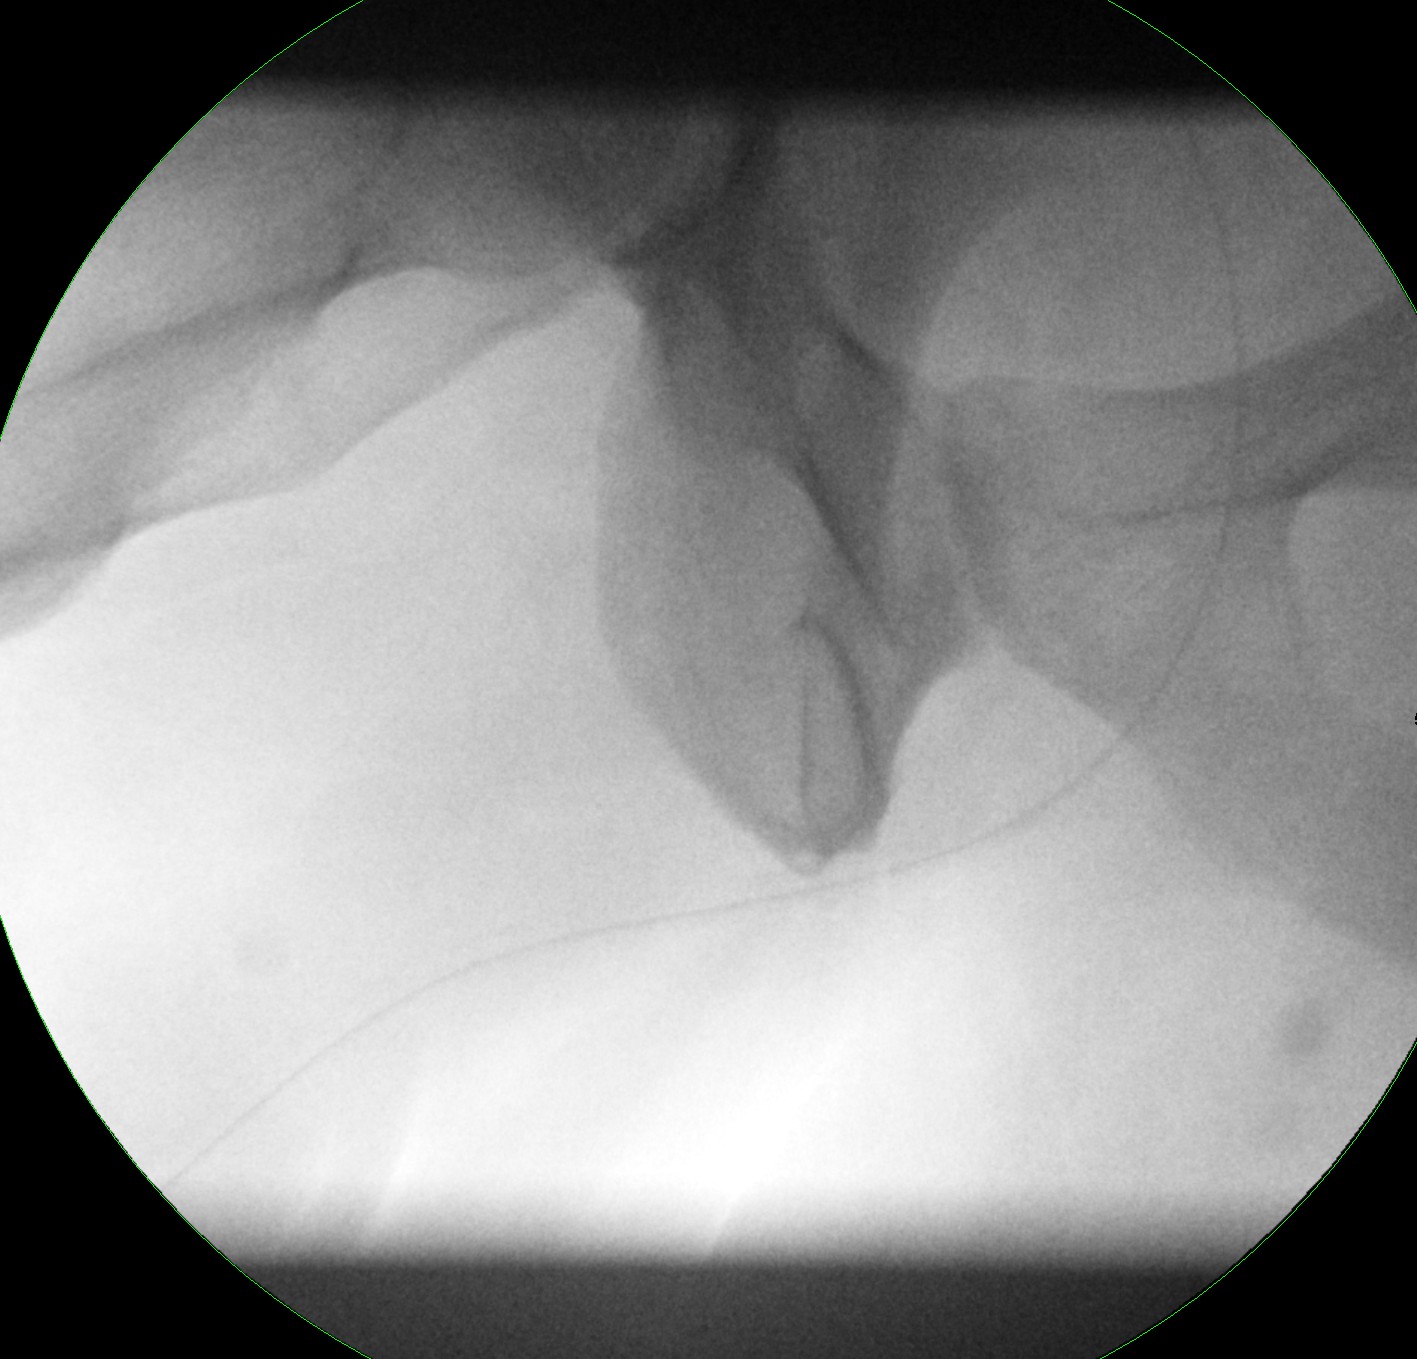
Following contrast injection there is normal irregularity at the site of the flap but no leak
Hints and Tips
This is an invasive procedure for the patient so good quality images answering the clinical question need to be obtained.
This is one of the most technically difficult fluoroscopy studies, particularly if the seal produced by the balloon is not adequate, the catheter may either fall out or contrast medium will leak over the patient.
Control image – it is not until you find an abnormality that you will realise that the control is important. In the case below, the control film shows the large bladder calculus that would otherwise be interpreted incorrectly as contrast in the bladder.
Control With contrast
AP v Oblique imaging – AP imaging is often not helpful due to foreshortening of the urethra. Oblique imaging elongates the entire urethra. Traction can be applied to improve images.
Note the foreshortening below on the AP view and also note the air bubble due to poor technique.
AP Oblique
Note the large leak hidden in the AP view but seen on the oblique.
AP view versus Oblique view
Frame grab with poor penile traction and motion artefact
Frame grab v exposure – Note the better quality image with improved spatial and contrast resolution when using a proper exposure.
Frame grab left, exposure right